| Last Update : 2017/02/21 |
|
|
| Question / Issue |
| Importing Data From Excel Into InsurancePro |
| Answer / Solution |
Importing Data From Excel Into InsuranceProITC cannot be held responsible for clearing data not properly imported into InsurancePro. Please read these instructions carefully. Not following or understanding these instructions before performing an import could cause your data to be imported in a way that is unsatisfactory. We recommend doing a small sample size to insure it will work for you. Step 1Prepare your data before importing. This is a very important step and can cost you time and money if not done properly. 1. If you have a column defining the Policy Status, the data must match the spelling of one of the following statuses: 1.a. Active Client Name is a single field that contains both the first and the last name of the Policy Owner. The first and last names of the Policy Owner is not divided into 2 fields. Your source data may have the names of the Policy Owner separated into 2 different fields. They must be combined BEFORE importing your data into InsurancePro. To do this, you can use the following syntax in cell C2 to combine cell A2 (first name) with cell B2 (last name) into cell C2: =(A2&" "&B2) If you have a middle name or middle initial column you can use the following syntax in cell D2 to combine cell A2 (First name) with cell B2 (middle name or initial) with cell C3 (Last name) into cell D2: =TRIM(A2 & " " & B2 & " " & C2) Client Name is what is searched when using the "Find Existing Policies and Customers" screen's "Name" field. Not defining this field will cause your data to import into policies that have no search-able name. Client First Name and Client Last Name is the primary insured and can also be considered the "Primary" driver. The Client First/Last Names are not search-able fields from the "Find Existing Policies and Customers" screen. 3. Column information must be valid. 3.a. First and Last name fields can be no longer than 20 characters long each. If any field is too long, InsurancePro will fail to insert the data. 3.b. Date fields must contain valid date formats (i.e. '3/18/2010'). 3.c. Numeric fields such as number of drivers or cars must contain a number. 3.d. If policy information is provided, such as a policy effective date, the policy expiration date must also be provided to prevent InsurancePro from expiring the policy. 3.e. If auto policy information is provided including driver details, ensure that the number of drivers is specified as well for each policy. 3.f. If companies are already entered then they must match spelling and case. 4. All data must be on the first sheet. 5. If you have a column defining the Policy Type, the data must match the spelling of the policy types in InsurancePro. 6. The data must be continuous. Ensure that the sheet does not have any: 6.a. Blank records 7. A new record in InsurancePro will be created for every row in the spreadsheet. In other words, InsurancePro will not perform any matching between the information in the spreadsheet and the policy data that is currently in your system. Step 2Login to InsurancePro and start the Import From Excel. Click on "Download/Bridge" at the top of the InsurancePro screen and then click on "Import Data from Excel Sheet". Now would be a good time to back up your Excel data before continuing.
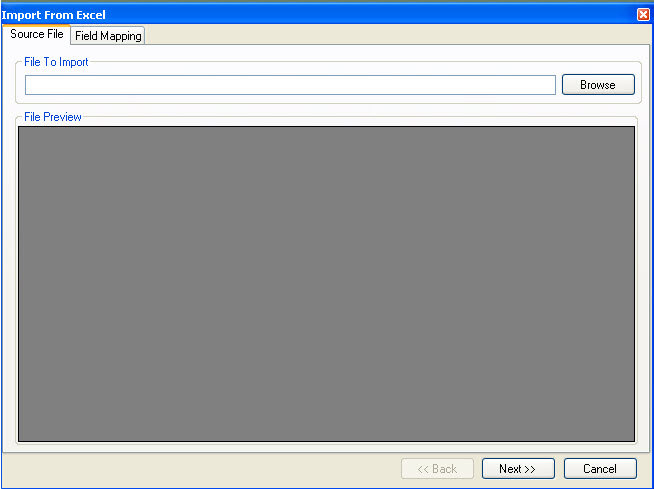
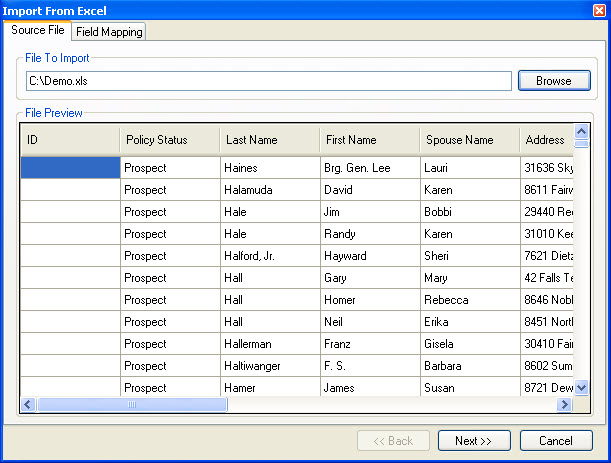
Step 3Choose the file to import by clicking on "Browse" and selecting the file that you have prepared. InsurancePro will load the data from the file into a data grid allowing you to preview the information before continuing. Click "Next" at the bottom of the screen.
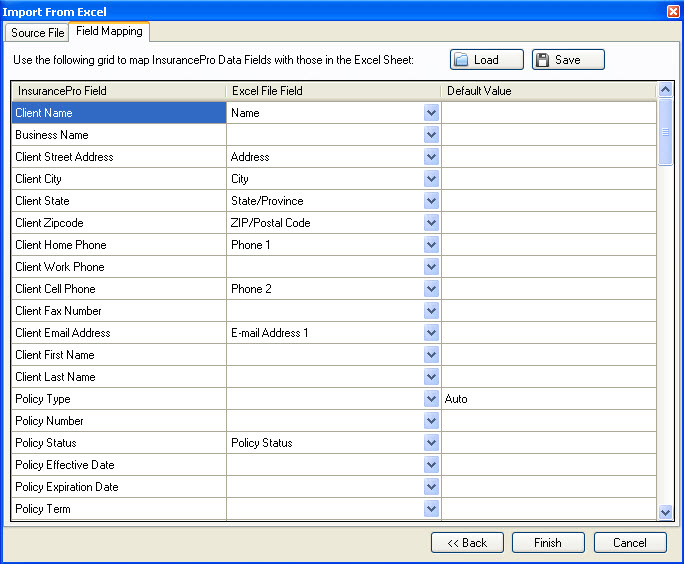
Step 4Select the appropriate field from the source Excel file to match with the InsurancePro Fields. Not all fields are required to be mapped. Unmapped fields from the Excel file will be ignored and unmapped fields in InsurancePro will either use the default value or will not import any data. If you are not importing a spreadsheet with a policy type or a policy status, please consider defining these values now.
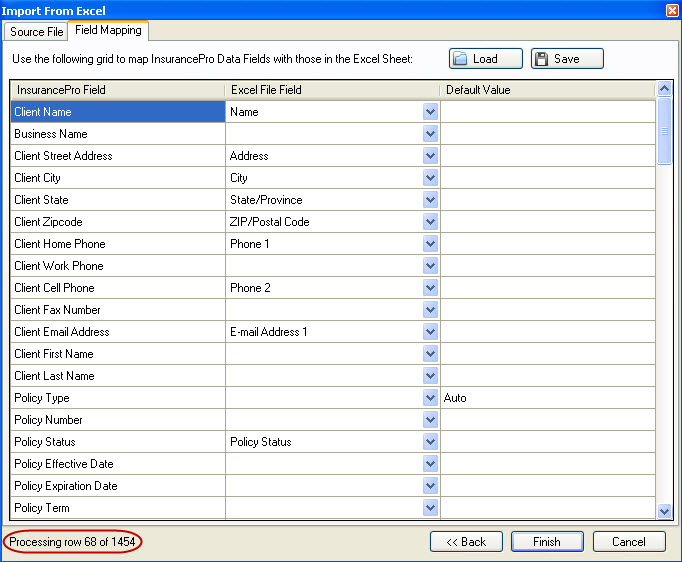
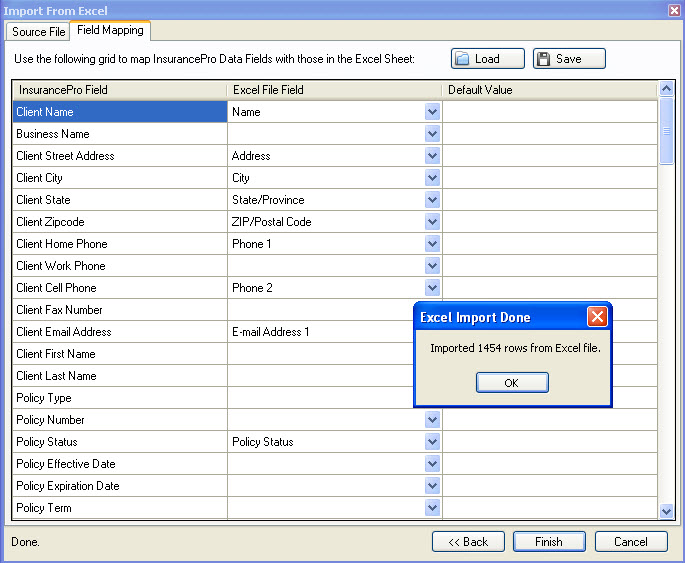
Step 5Click "Finish" to start the import. A message in the bottom left of the screen will display informing you of the progress of the import.
Step 6Click "OK" on the "Excel Import Done" message box and the Excel Import screen will close.
|
| Direct Link to This FAQ |
| http://www.itcdataservices.com/support/IP6FAQ/?f=131 |
| Tags |