| Exporting Data to Quickbooks 2003+ Last Update : 2020/07/01 |
|
|
| Question / Issue |
| Exporting to QuickBooks® |
| Answer / Solution | ||||||||||||||
Exporting to QuickBooks®Software Requirements:
Windows 7 and Vista Users
Please turn off UAC. Not turning off UAC can cause IP to not be able to initiate a connection with QuickBooks®. It will give you an error stating that IP "could not start QuickBooks®".
Windows 8 & 10 Users Please run InsurancePro as an administrator to initialte connections with desktop versions of Quickbooks.
Field Mappings:
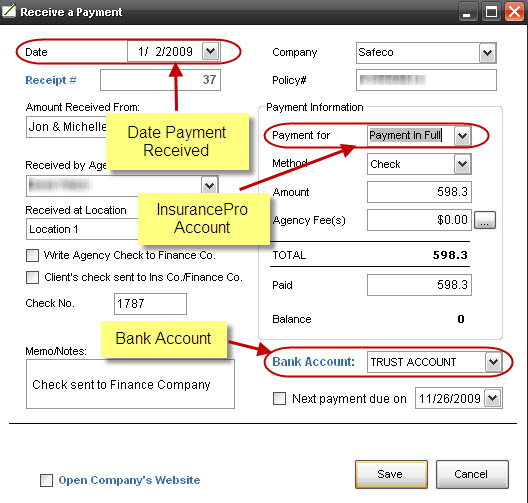
Clients/Customers *NOTE - Accounts must be entered into QuickBooks® prior to exporting any data. InsurancePro will not export or preconfigure these accounts for you. Account Mappings:InsurancePro has 2 types of accounts: 1. Bank Accounts Bank Accounts are configured in InsurancePro by clicking on "Payments" and then "Setup Bank Accounts". Categorical Accounts are configured in InsurancePro by clicking on "File/Options/InsurancePro Setup Options" and then clicking on "Setup InsurancePro Accounts". Both types of these accounts must be pre-configured in the "Chart of Accounts" in QuickBooks®. Please refer to the QuickBooks® manuals on how to do this. If the accounts do not exist in QuickBooks® before an export is initiated, the export will fail. Receiving Payments or Writing Checks with QuickBooks® in Mind:There are 3 key fields when receiving a payment or writing a check with regards to ensuring the transaction affects the appropriate accounts: 1. "Bank Account" - refers to the bank account the transaction will affect Below is the Receive a Payment screen.
Below is a Write a Check screen. Note that the check is written to "Progressive" which will match with a company that can be exported.
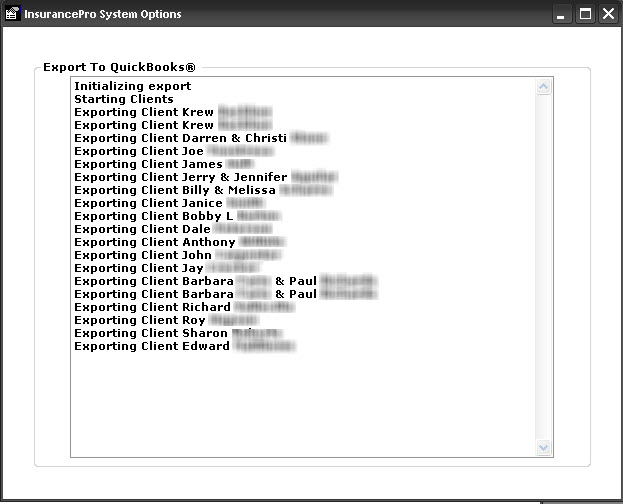
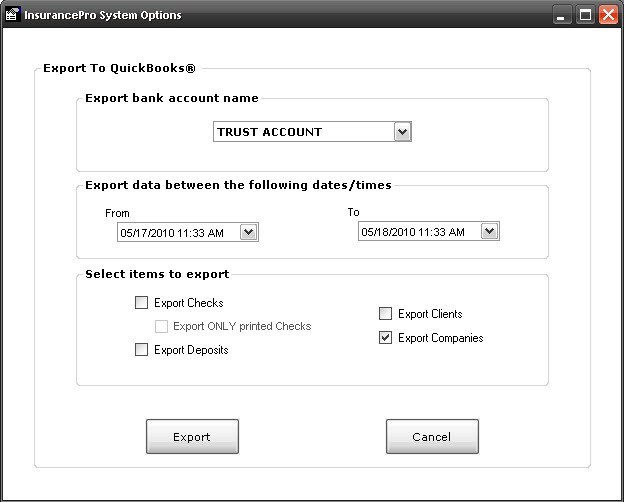
Exporting To QuickBooks®:When exporting any data, you must make 3 decisions: 1. Deposits and checks are all associated with a bank account in InsurancePro. You must decide which bank account's information will be exported. Exporting Clients:Exporting clients will export into QuickBooks® the names of all policy holders that have active policies during the range of time specified on the Export To QuickBooks® screen. Please be sure to have QuickBooks® running before clicking "Export". You may be prompted at this time by QuickBooks® to allow for the two applications to communicate.
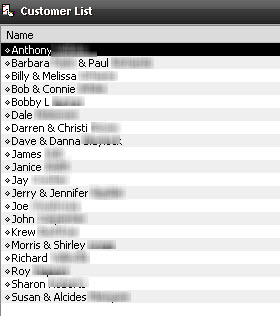
During the export, your screen will detail each of the clients that are exported as they are sent to QuickBooks®. InsurancePro will check for duplicates and avoid inserting duplicates in the case that one may exist. In QuickBooks®, you can view the "Customer List" and see the list of clients that you have just exported. The client "Edward" as seen in the above screenshot is not displayed below due to the limitations of the QuickBooks® license used to create this document.
Exporting Companies:Exporting companies will export into QuickBooks® the names of all companies configured in InsurancePro. Please be sure to have QuickBooks® running before clicking "Export". You may be prompted at this time by QuickBooks® to allow for the two applications to communicate.
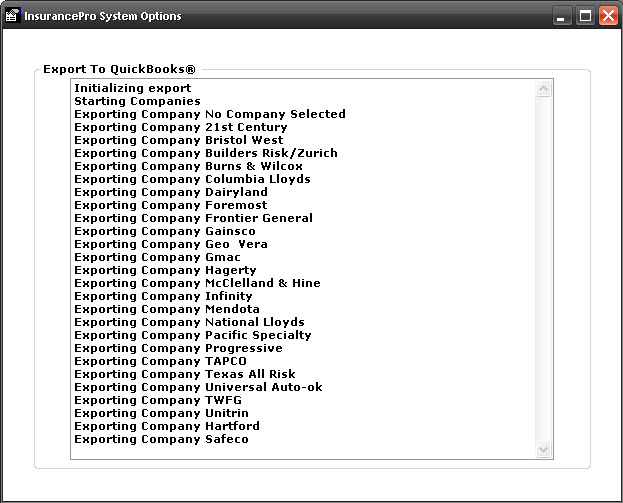
During the export, your screen will detail each of the companies that are exported as they are sent to QuickBooks®. InsurancePro will check for duplicates and avoid inserting duplicates in the case that one may exist.
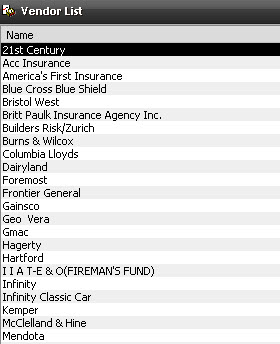
In QuickBooks®, you can view the "Vendor List" and see the list of companies that you have just exported.
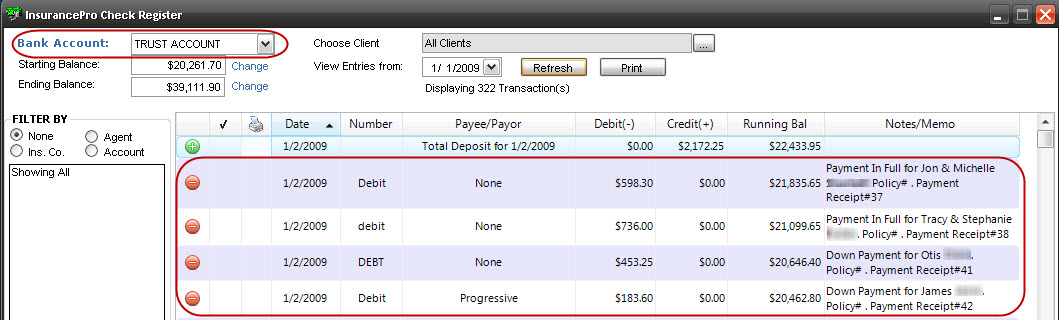
Exporting Checks:Each time checks are exported, all "Pay To" names are exported to the "Other Names" category in QuickBooks® if the name does not already exist elsewhere as a vendor or a customer. Each check is recorded separately. In this example, we will be exporting the 4 "checks" highlighted in the screenshot below from the InsurancePro Check Register screen.
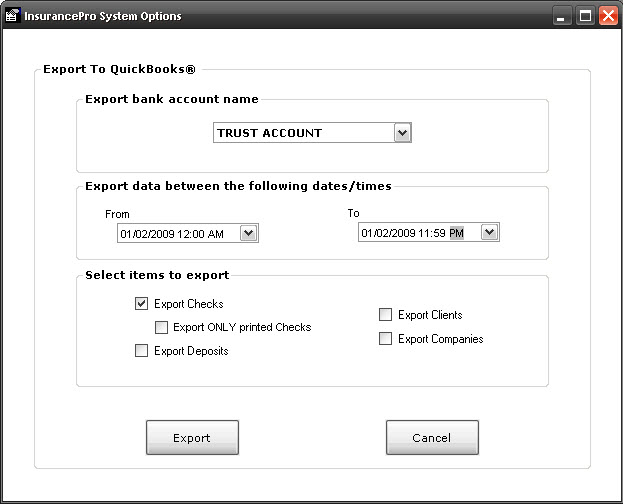
The Export To QuickBooks® screen below displays the selected values to export the "checks" displayed in the screenshot above.
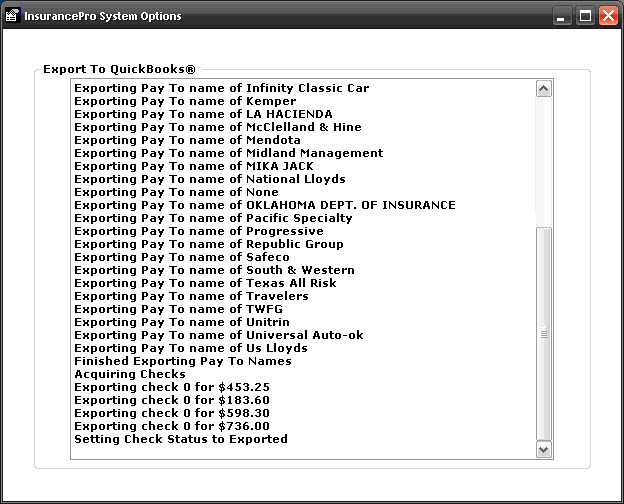
When you click "Export", the screen will detail the current actions being taken by InsurancePro (see below). You may be prompted at this time by QuickBooks® to allow for the two applications to communicate. Please be sure to have QuickBooks® running before clicking "Export".
The Export To QuickBooks® screen will reappear after the export is completed. The check number is listed as "0" on each of the above exported checks because each transaction was recorded as a debit with no check number. In QuickBooks®, you can see the checks that have been exported by viewing the bank account's register. The screenshot below shows the above checks that have been exported to QuickBooks®.
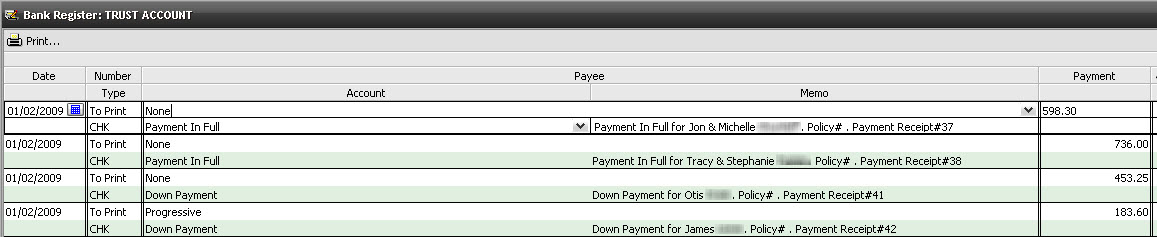
Exporting Deposits:Each time deposits are exported, all payment methods are verified to be configured properly in QuickBooks® before moving on to exporting deposits. Once verified, all payments received within the date and time range and the bank specified will be exported as a single deposit to that specified bank account. In this example, we see that there were 5 payments received on January 2, 2009 on the Daily Transaction Report screen.
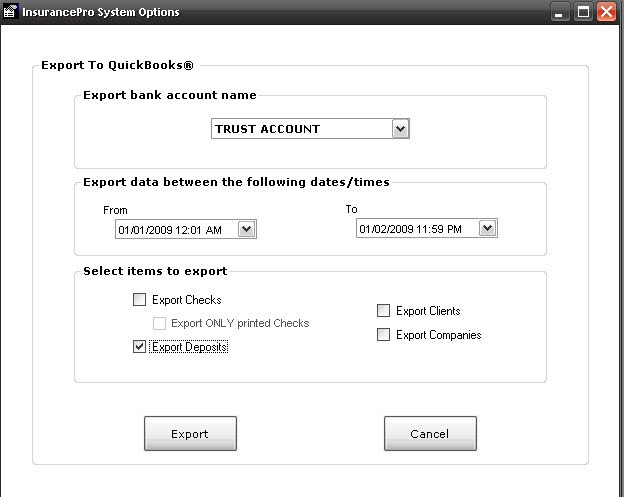
In the screenshot above detailing the payments received on January 2, 2009, the bank account is "TRUST ACCOUNT" as chosen in the "Bank Account" field. The Export To QuickBooks® screen below displays the selected values to export the payments displayed in the Daily Transaction Report screenshot above.
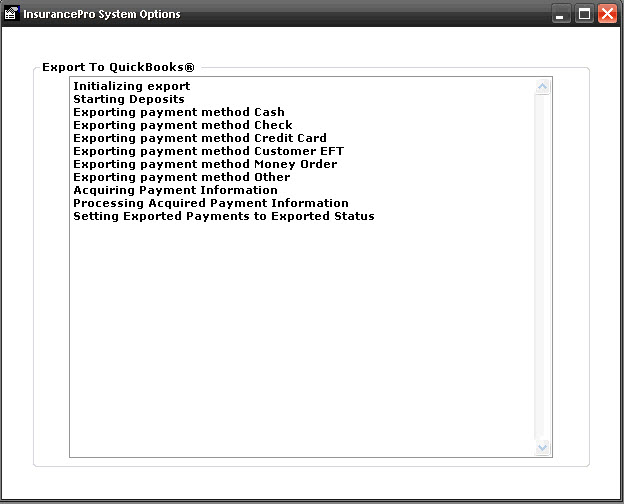
When you click "Export", the screen will detail the current actions being taken by InsurancePro (see below). You may be prompted at this time by QuickBooks® to allow for the two applications to communicate. Please be sure to have QuickBooks® running before clicking "Export".
The Export To QuickBooks® screen will reappear after the export is completed. QuickBooks® will now have the deposit recorded in the register of the bank account that was chosen as seen below.
The deposit recorded can be drilled down into to display information on the payments received as seen below.
|
| Related FAQs | |
| How do I set up my transaction accounts for payments I receive or checks that I write? | |
| Common QuickBooks® Export Errors Common Errors When Exporting to QuickBooks® |
|
| Direct Link to This FAQ |
| http://www.itcdataservices.com/support/IP6FAQ/?f=124 |
| Tags |
| QuickBooks Export |

.jpg)